
Github 设置
大约 1 分钟
新建仓库
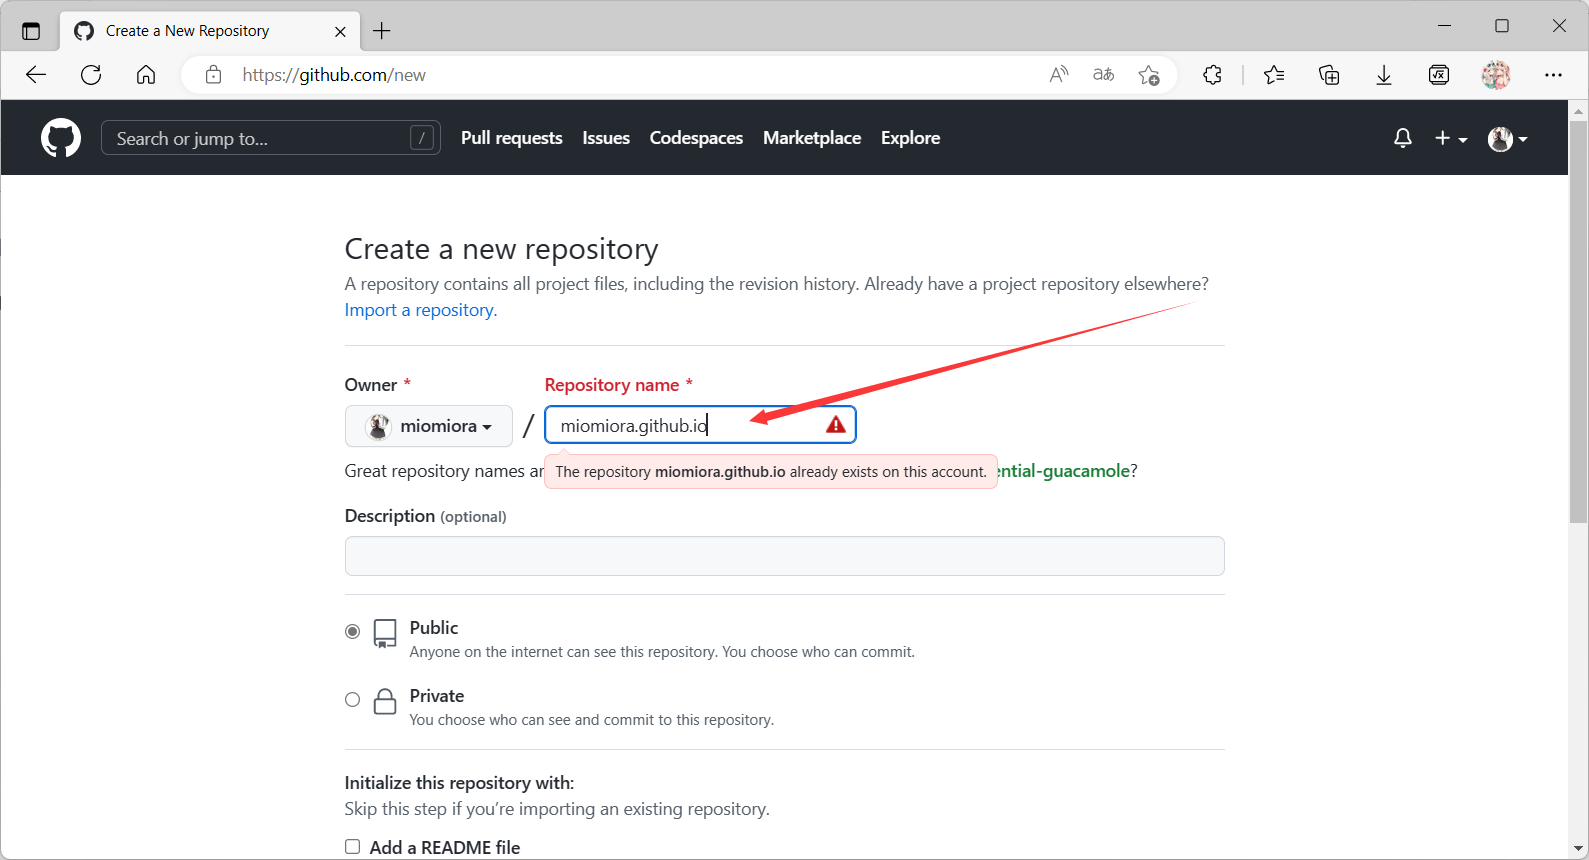
打卡Github 点击 New repository 这里需要注意的有,如果你想你的博客地址简短,这里仓库名字需要以 GitHub用户名.github.io 来命名,如图所示,输入好名字之后直接点最下方的 Create repository即可
push代码
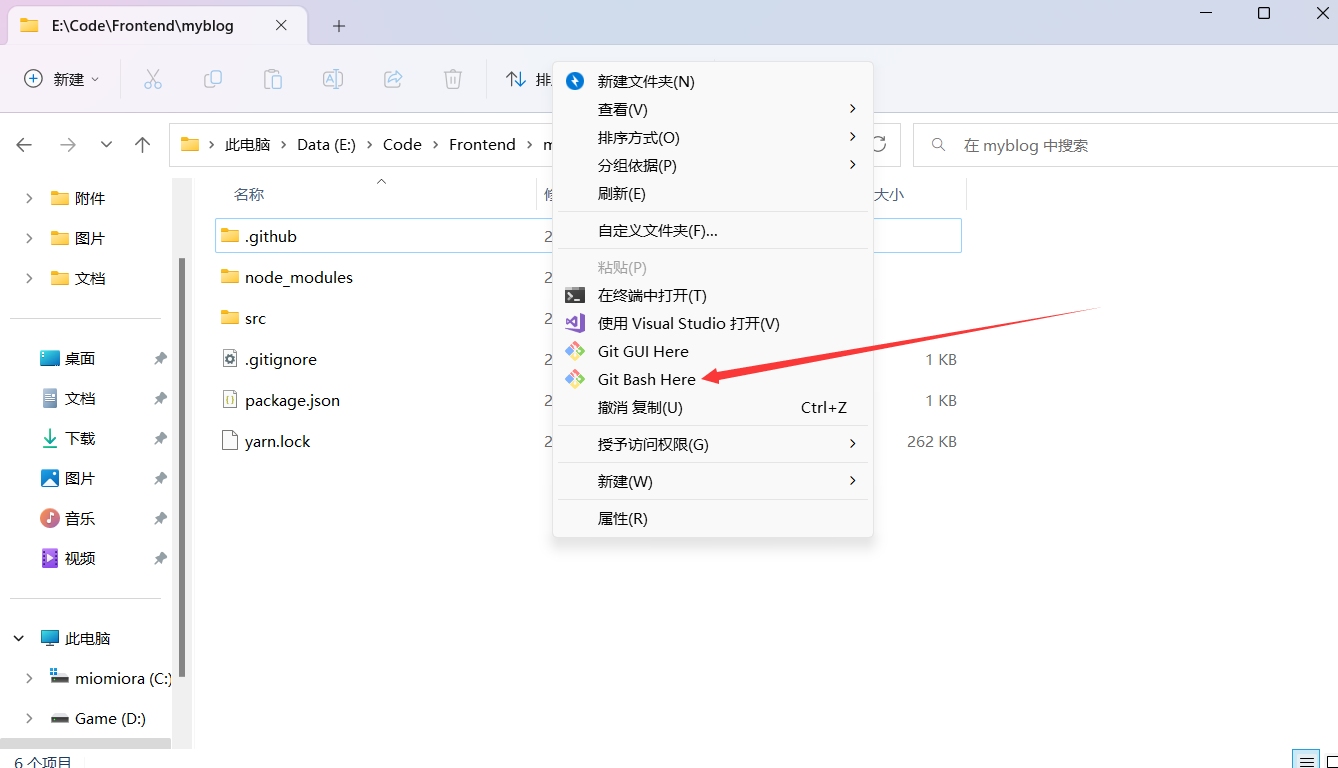
在项目的目录下打开Git Bash Here
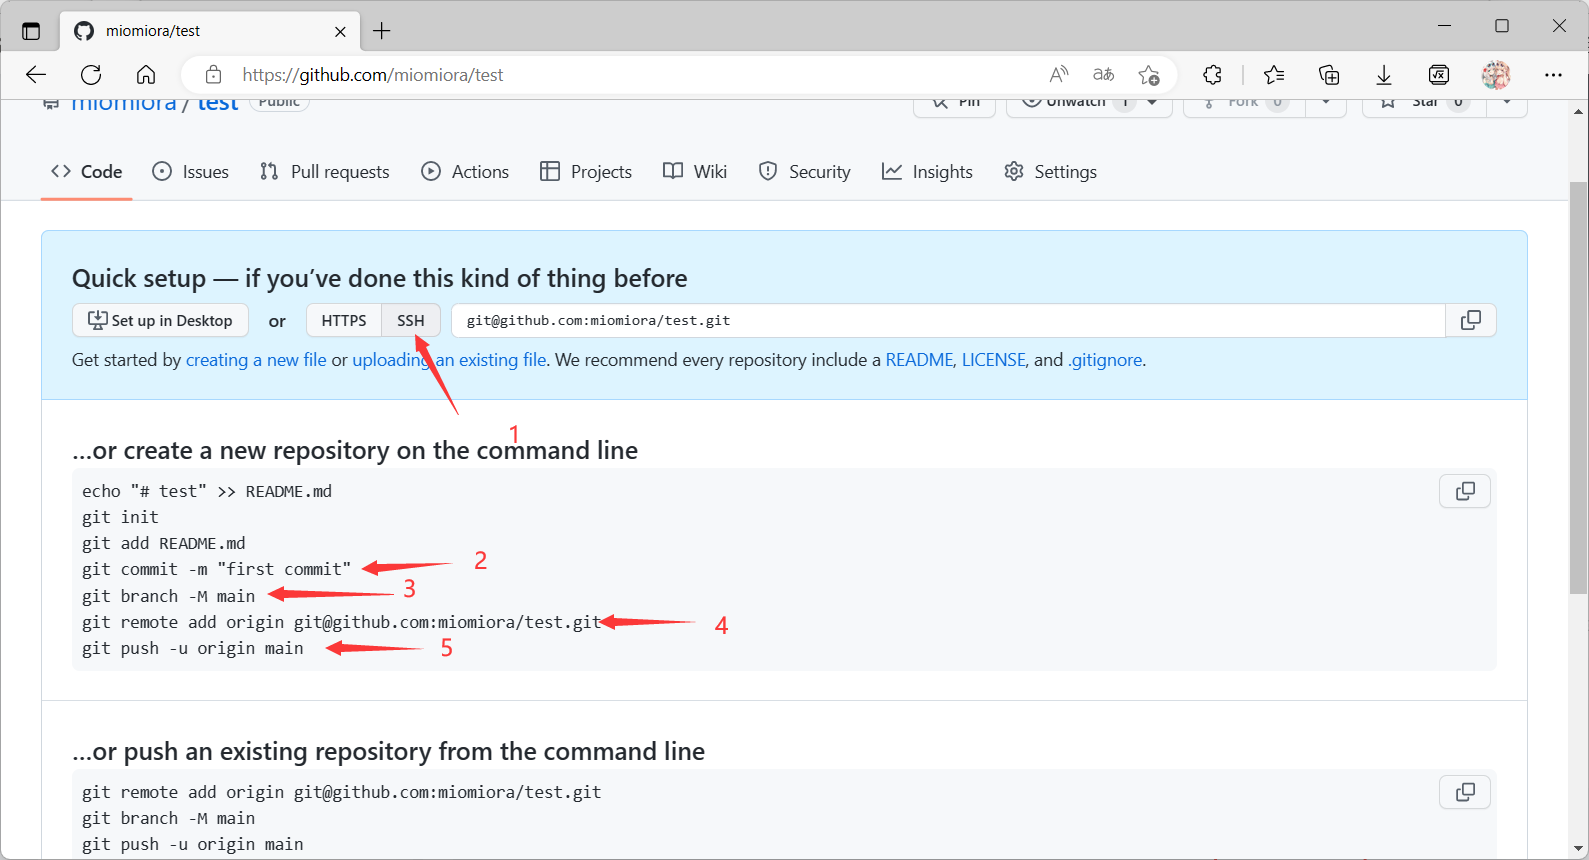
仓库创建完毕后会有一个Quick setup的页面,点击SSH,然后把下面的2-3-4-5依次粘贴进Git Bash中执行即可
提示
在进行 2-3-4-5 之前,需要先执行 git add .
GitHub权限设置
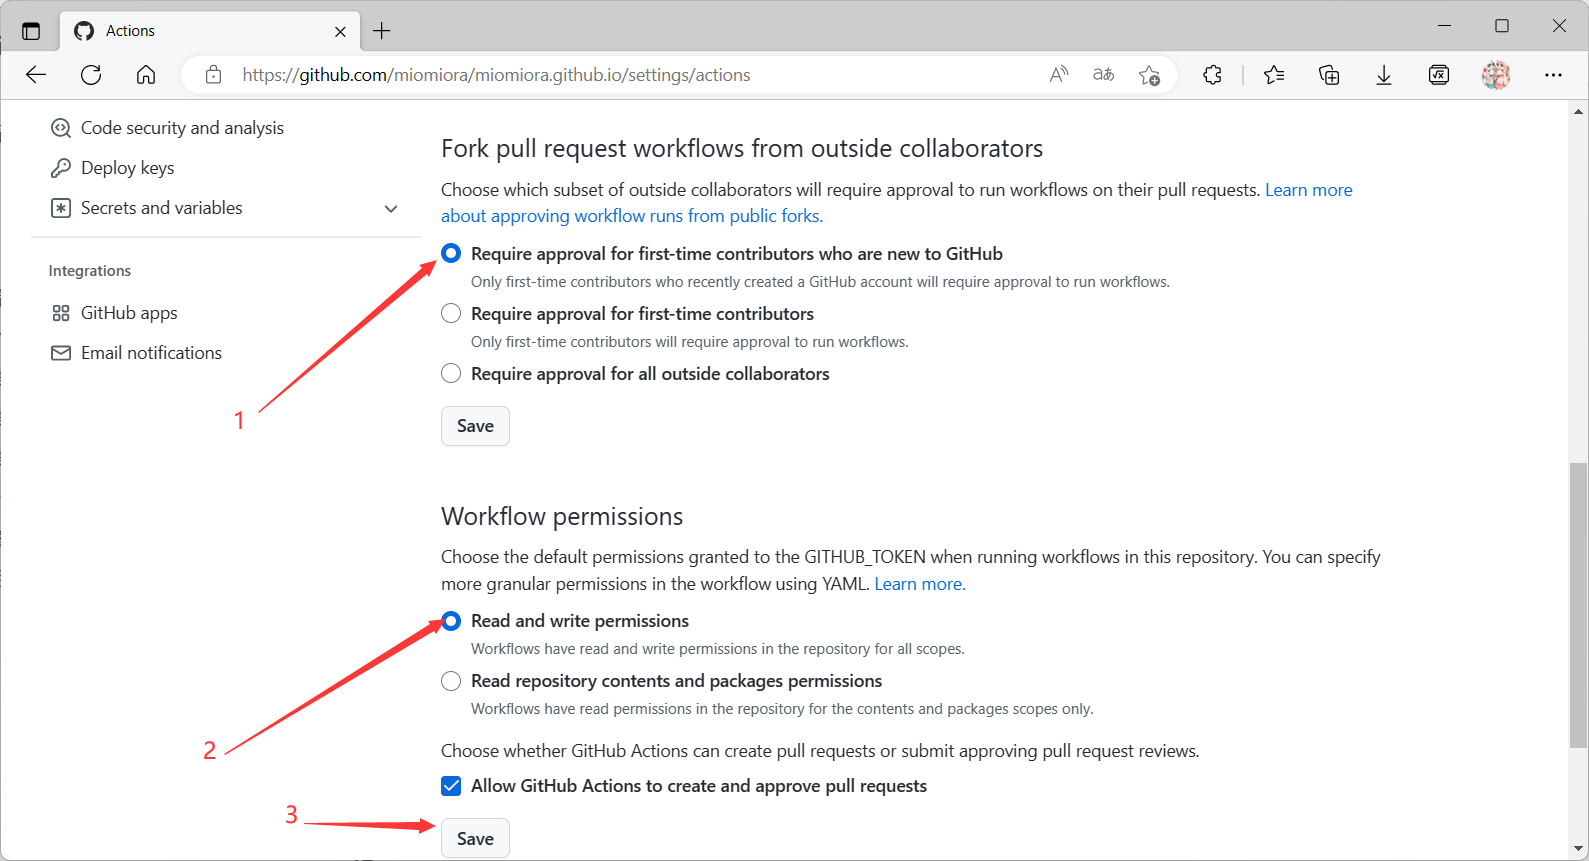
打开 刚刚新建的仓库 -> Settings -> Actions -> General 中去
往下翻,按照图示的设置完保存即可
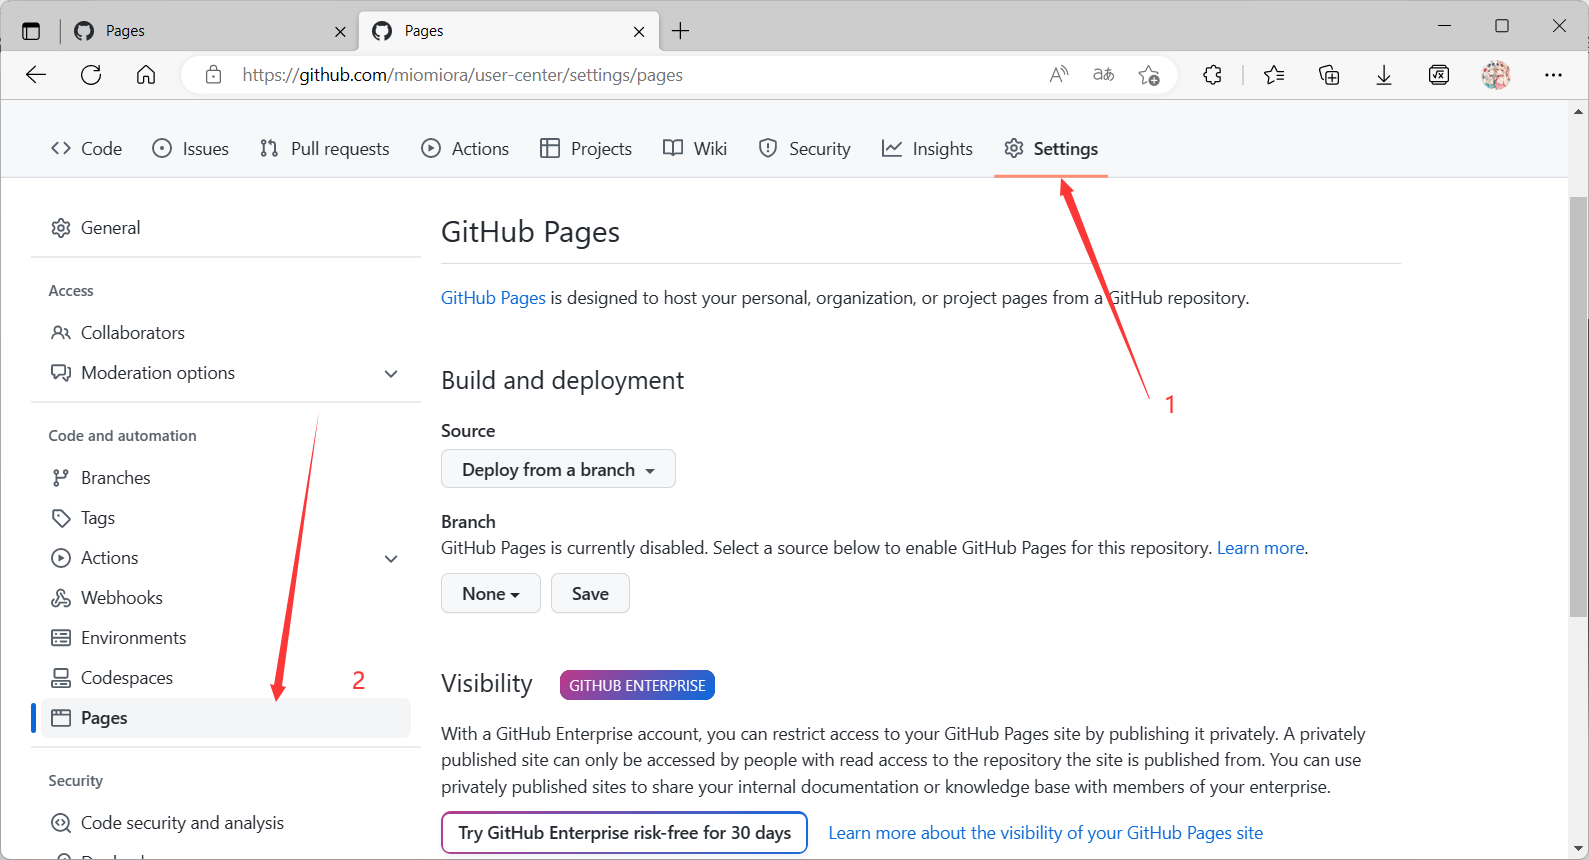
GitHub Pages设置
打开 刚刚新建的仓库 -> Settings -> Pages 默认的是如下图
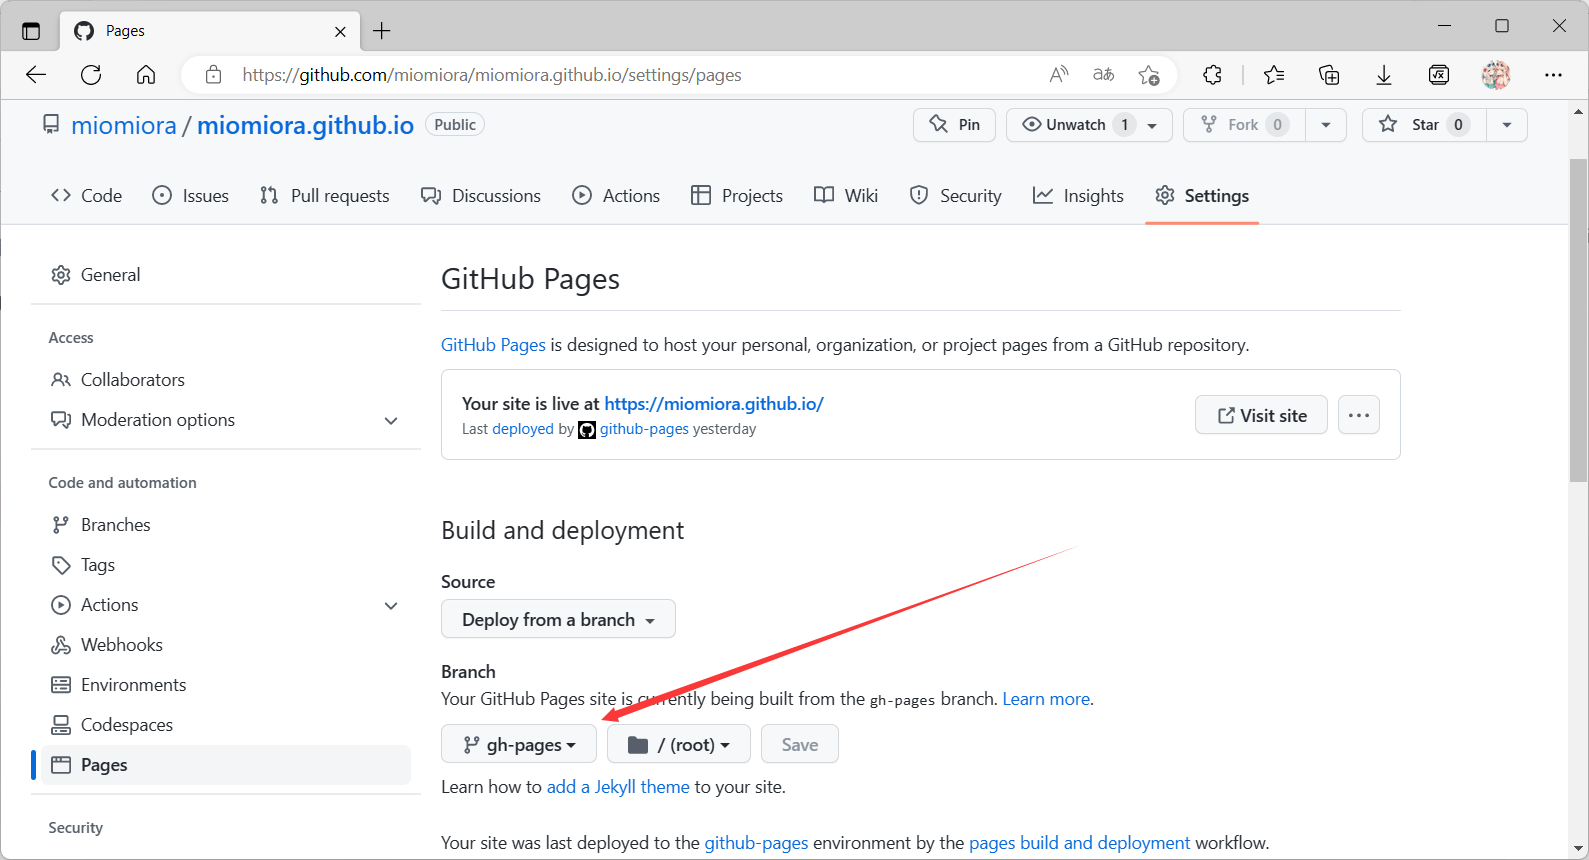
改成如下图所示的状态,然后点 save
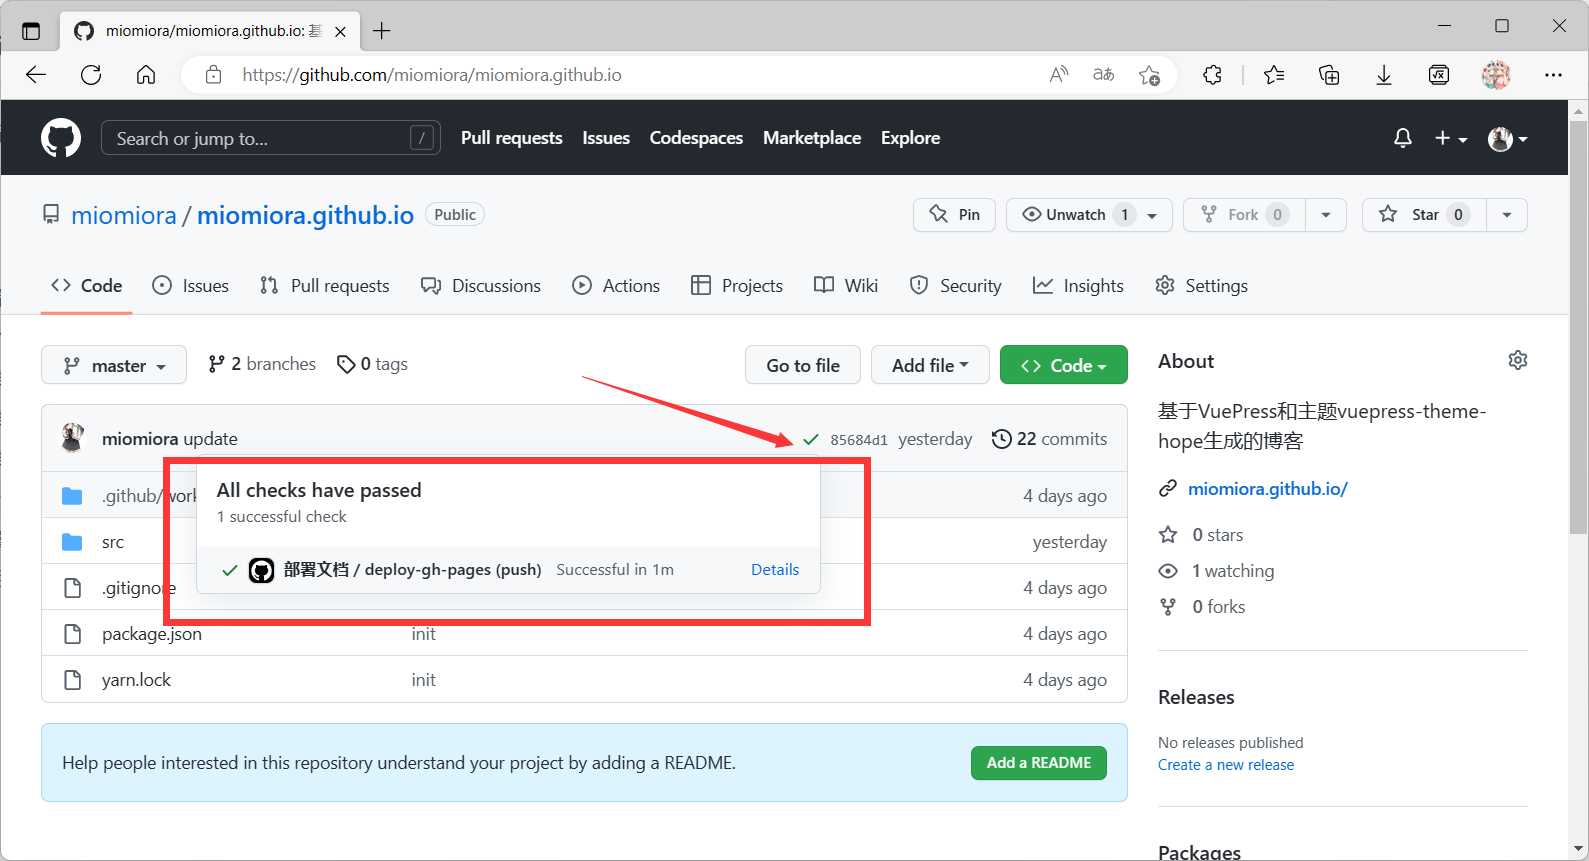
检查
查看Github工作流是否成功部署,打了绿色的 √ 即为部署成功,为红色的 x 就点开Details查看报错
访问博客
直接输入 用户名.github.io 即可,比如本博客为 miomiora.github.io
结束
到此为止博客就已经部署完毕